Looks Like Your Cart Is Empty!
Log In To Reorder


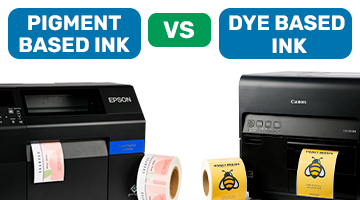
Having an Epson inkjet printer in your business unlocks a world of opportunities, particularly when it comes to on-demand label printing. This capability serves as a game-changer for businesses in various industries.
Be it for crafting attractive packaging that catches the eye of potential customers, or for printing crucial chemical labels in a warehouse setting, the ability to produce these labels in-house is indispensable.
Gone are the days of outsourcing your printing needs and waiting for days on end to receive your labels. With an Epson printer, you can have them ready in a matter of minutes. The impact is multidimensional – it offers financial savings, enhances efficiency, and allows for greater control and customization.
But what comes next after getting your hands on an Epson label printer?
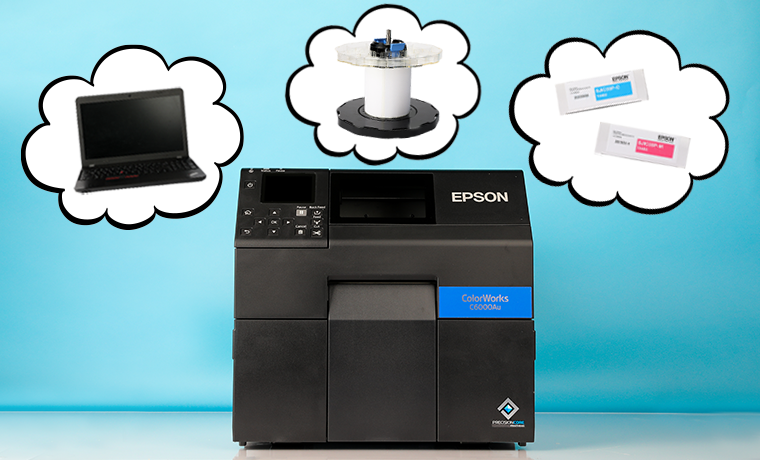
It can seem daunting to have to set up a new printer by yourself, but don’t worry, it’s easier than it looks. At Smith Corona, we pride ourselves on our extensive knowledge of all things Epson, so we’re going to teach you how to set up an Epson printer.
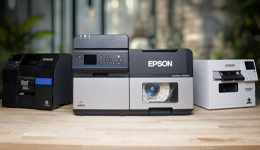
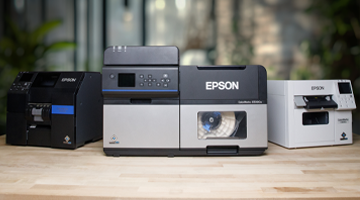
With our unparalleled selection of top-notch Epson inkjet and colorworks printers, we can guide you through the installation process and even help you print your first label! The model we will be helping you set up is the Epson C6000A, however, our Epson printer setup tips can be applied to all other models as well.
How to Set Up an Epson Printer
Step 1: Unbox Your Printer
")
The first thing you will want to do when your new printer has arrived is take it out of the box. In the box, you will find instructions, a power cord, a USB cord, and ink cartridges in the colors cyan, yellow, magenta, and black.
Now, your black ink will either be matte or gloss, depending on which printer type you purchased. It’s crucial to configure your printer based on the type of ink you’re using — but don’t worry, we’ll delve more into that topic later.
Once you’ve removed your printer and its accessories from the box, you will find that there is lots of protective packaging on your printer like plastic, styrofoam, and blue tape.
Go ahead and remove all of this packaging. Make sure to also remove the blue tape that is in and around your printer’s cartridge bay, as this will prevent any printing mishaps or errors.
Finally, take out your sample roll of labels found inside of the printer.
Now that that’s out of the way, the real work can begin!
Step 2: Prepare Your Printer
Plug In Your Printer

Now that your printer is free from all protective packaging, you can plug it in. First, take the power cord and plug it into your printer — there will be a slot for this on its backside.
After that, find an outlet where you would like to set up your printer, take the other end of the power cord and insert it into that outlet.
Once you’ve plugged it in and pressed the power button, you will see that your printer now has lights and displays on its dashboard. If you don’t see anything, make sure the outlet you used is working and that both ends of the power cord are securely plugged in.
Make Selections

Using the printer dashboard, you’re going to make a few small adjustments to ensure your printer is set up correctly. The first thing you want to do is select which language you would like the printer’s display to be in, and input the correct date and time.
Then, an important step is choosing matte or gloss. This is crucial because you can only make this decision once, and you won’t be able to change it without purchasing a new printer.
You’ll make this decision based on the type of printer you purchased and the ink that comes with it. The black ink will be either a matte or gloss finish, so choose accordingly.
To ensure you are selecting the correct ink cartridges, take note of the unique identifying features on them. Each cartridge will be labeled with a product number and a color designation (black, cyan, magenta, and yellow).
Importantly, the finish type — matte or gloss — should also be clearly labeled on the cartridge.
Make sure this finish type matches with your initial selection on the printer setup. If you are unable to locate these details, refer to the packaging or documentation that comes with the cartridge, or consult the team at Smith Corona for help.
Load Ink Cartridges

After that, you’ll need to load your ink cartridges. This should be a simple process as most printers come with instructions on how to correctly align and insert the cartridges, however, we will walk you through it.
Make sure that you shake your ink cartridges about 15 times, this will help the ink flow better.
Next, open the printer’s cartridge door and correctly align the unpackaged cartridges in their designated spots. Once they are securely in place, close the cartridge doors.
Finally, press “installed” on the printer so the installation process, which takes about 20 minutes, can begin.
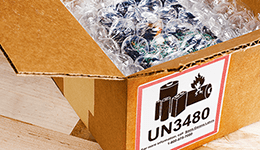
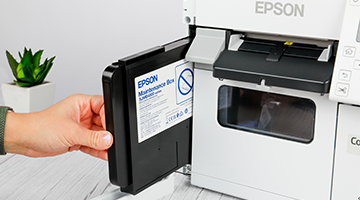
Please be aware that the ink installation process will use up about half of your maintenance box and a significant amount of ink. To avoid any inconvenience caused by running out of ink or maintenance supplies, we strongly advise purchasing an extra set of ink and an additional maintenance box when you buy your printer.
This will guarantee smooth operation and ensure you’re always prepared for uninterrupted printing!
Step 3: Download Your Epson Printer Driver

Once your initialization is complete, it’s time to download your printer driver. A printer driver is software that communicates with your printer and enables it to print labels from your computer.
To download the Epson Connect Printer Driver, visit the Epson support page and navigate to the ‘Downloads’ section. From there, you’ll enter your printer’s model number and operating system to find the appropriate driver.
Once downloaded, open the file and follow the installation instructions. You may need to restart your computer for the driver to take effect.
After you have downloaded your printer driver, you can adjust the paper settings on the driver.
This is where you will select the type and size of paper you are using for your print job. You can also adjust other settings, such as print quality and color options.
How to Print Labels
Step 4: Load Your Labels

Now that you’ve completed the Epson Connect process and downloaded your printer driver, you’re ready to load your labels!
After ensuring your printer is turned on, take the spindle out of the printer and open the paper cover.
Assuming you have taken the plastic wrap off of your sample label roll, place your roll onto the spindle.
Make sure the labels are facing up and feed the free end of the label roll through the rollers until it reaches the exit slot.
Next, feed the paper into the printer and adjust the paper guide to the size of the label to lock it in place. Finally, close the paper cover and press pause on the printer’s control panel to resume printing.
Step 5: Print Your Labels

Once your labels are loaded, you’re ready to print!
Make sure your printer is turned on and the correct driver is selected. Then, open the document or label template you wish to print and select ‘Print’ from the File menu.
This will bring up a window where you can adjust any final settings before hitting ‘Print’.
After your labels have been printed, let them sit for a few minutes to allow the ink to dry before handling them.
Congratulations! You’ve printed your first set of labels using your Epson printer.
Now you can continue to use the same process for any future label printing needs.
Keep in mind that there may be some trial and error in finding the right settings and adjustments for different types of labels, but with practice, you’ll become a pro at printing professional-quality labels.
Preserving Your Ink
After you’ve set up your printer, there are a few initial settings that you may want to adjust for optimal performance and to reduce the amount of ink wasted. One of those is your nozzle settings. The nozzles in a label printer are responsible for dispersing ink onto the label to create text and images. It’s important to keep these nozzles clean, as buildup can affect the quality of your prints.
Nozzle Check Interval
Your Epson printer will check its nozzles periodically and clean them automatically.
It will do this once the nozzle check interval you’ve set has been reached. A nozzle check interval is a predetermined number of label prints before the printer performs an automatic nozzle check and cleaning.
This can be set to your preference in the maintenance options on your printer, typically found under ‘Maintenance’.
The ‘nozzle check interval’ is initially set to 500, but it is recommended that you change this to 5000.
As you continue printing, you can further customize this value based on your specific printing needs.
Threshold of Clogged Nozzles
Similarly, the ‘threshold of clogged nozzles’ setting can be adjusted to determine when your printer will initiate a cleaning cycle.
This just means that when a certain number of nozzles are clogged, the printer will automatically clean them.
The threshold of clogged nozzles is initially set to 6, but it is advisable to change this to 12.
Again, you can adjust this value depending on your printing situation.
Scheduled Periodic Cleanings
At times, your printer automatically performs periodic cleaning to keep the print head in optimal condition.
This cleaning process lasts for 3 to 14 minutes, temporarily disabling printing.
However, you have the option to prevent the cleaning cycle when you need to print. To avoid interruptions during production, it is advisable to schedule periodic cleanings during non-printing hours.
By following these guidelines, you can ensure smooth and efficient printing with your Epson Colorworks label printer.
And remember, if you ever need assistance, the team at Smith Corona is always here to help.
Not only do we know Epson printers like the back of our hand, but we are your one-stop shop for all your printing needs.
Our wide selection includes Epson ColorWorks printers, accessories, and a variety of inkjet roll labels in different sizes, materials, and finishes.
You can trust Smith Corona to provide you with the best labeling solutions!
Visit our website at www.smithcorona.com to explore our extensive collection.
If you have any questions, our dedicated team is available to assist you when you call 1-800-875-7000.